
Conjuring a Faerie!

How to Paint a Moon Faerie in Watercolor
Bringing the creatures of your imagination to life — one luminous layer at a time.
Welcome back to my lil' painting corner of the internet! Today we're going deep into one of my favorite subjects — a faerie.

Supplies:

Thin watercolor brush
Watercolors (I use Stonegournd Paint Co and made a custom magic palette or them!)
Watercolor paper (I like Arches Hot press, but Stathmore os great too! Anthing that is at least 140lbs)
Mixing Palette for color testing
Coffee or tea for drinking and painting.
STEP ONE:
Make your environment magical!
Here is a youtube playlist I listen to in order to conjure a relaxed and focised state of mind that can wander into the realms of lore!
STEP TWO: DRAW

Begin with a pencil sketch. Identify the pose you'd like your faerie to take (drawing is another story for another day and you can subscribe to get more lessons on drawing itself. It is the root of all good paintings!)
I keep my pencil sketch light, as the watercolor will cover most of it, but not all of the blemishes.
STEP THREE: STAIN
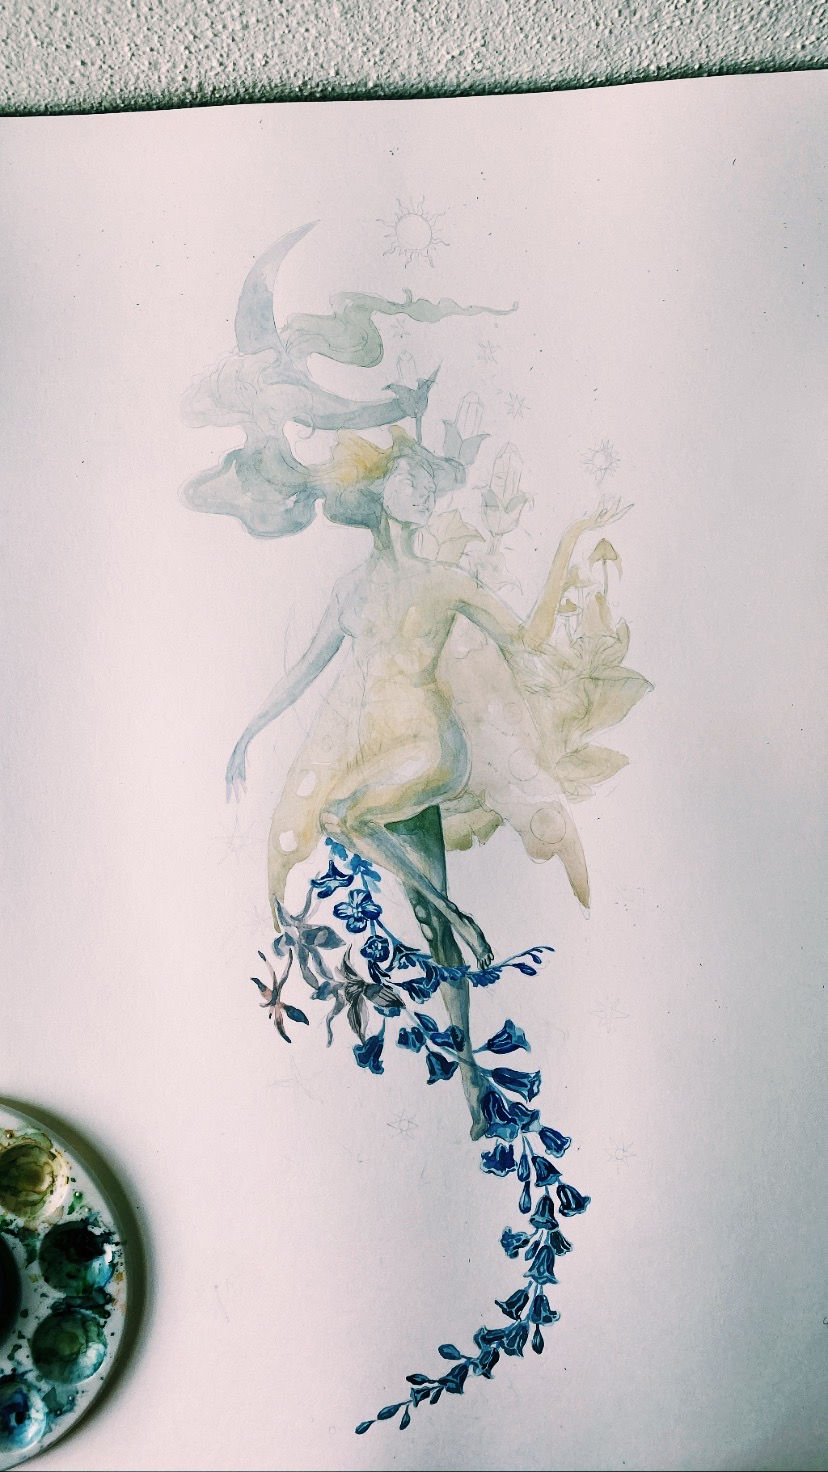
Use VERY light layers of yellows- I'm using the Faerie Palette I made, but any watercolor will do. A yellow orchre is my favorite becuase it earthy. Then I add in some cool tones to hint at shadows.
Add the shadows to the bottom sections of your forms, as the sun light hits the tops of all earthly creatures, not the bottoms.
Work lightly in watery layers! Slower is better and creates smooth airbrushed transitions.
STEP THREE: LAYER

After the main shapes are blocked out (like arms and wings) then texture and details can be attended to.
I love this section as it allows for more control. Depending on how your staining went, this is the part where you can use a smaller brush to use darker pigments to create contrasts.
This is where I'm adding int details like the butterfliy wings and the mushroom's gills.

THE FACE
I'm careful when detailing the face, leaving the area around the eyse light so the luminosity of the paper can shine through.
When you paint human-like creature's, the face is VERY important, as it is where the eye is naturally drawn to establish an understanding of the creature's personality.
If you want the being to be ethereal, and have an inner glow, keep the eyes shining. Just as you would your own.
And above all, watch with glittering eyes the whole world around you because the greatest secrets are always hidden in the most unlikely places. Those who don't believe in magic will never find it.”
---Roald Dahl
STEP THREE: FINAL DETAILS

Step back from the painting, and see if there is anyhting else that needs to be addressed. I go for a walk or wait for another day to revisit the faerie.
Sometimes brings some blue from the bottom to the top or yellow from the left to the right can help spread the unity of colors. By lightly glazing with a bit of yellow at the end, your piece will have this uniform spread of color that links the whole anatomy together.
My brush is very tiny, so be sure to get yourself a small brush that allows you to give details to all the tiny details that exists in the flora and fauna all around us!
30 SECOND PROCESS VIDEO
If you would like to see HOW I painted this faerie, here is a video of its creation! Sometimes watching can be the best way to learn! This will help you far more than this post!
IF you enjoyed this tutorial, please subscribe or say hello! I design these little newsletters to spark curiosity and encourage creativity inspired by the natural world and the myths that unite reality and dream:)
All of the mythical beings I have been painting and classifying can be seen in this labratory here! Dragons, centaurs, and mermaids abound in the realms of Loreland!


Comments